Focuslaser Fiber marking machine guide steps on ceramic cups
Using a fiber laser marking machine to engrave ceramic cups requires appropriate parameter settings and operation steps.
The following is a detailed guide:
1. Preparation
Material Inspection
Ensure the surface of the ceramic cup is clean and free of oil or water stains (which may affect laser absorption).
Confirm the ceramic type:
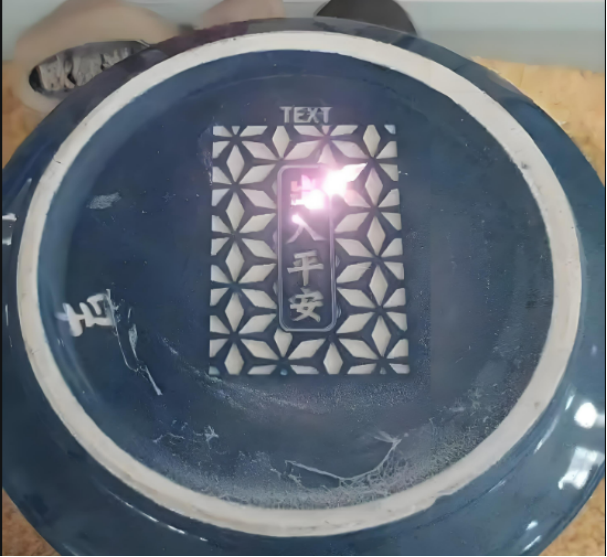
Glazed ceramics: The laser will ablate the glaze, revealing the underlying ceramic (white or beige).
Unglazed/plain ceramics: Direct engraving will produce a matte gray mark.
Specially coated ceramics (such as laser-sensitive coatings) can produce dark (black/gray) marks.
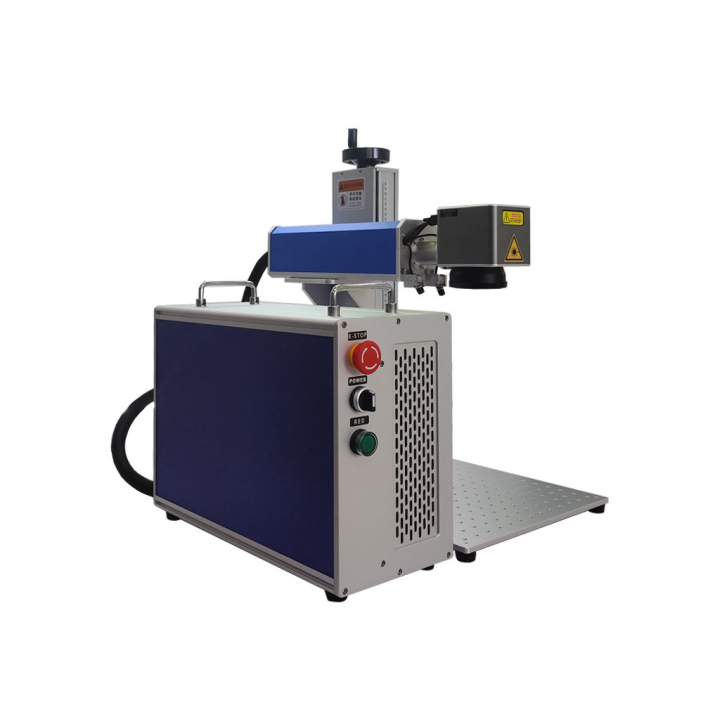
Equipment Commissioning
Install the rotary axis (for cylindrical cup engraving) or the fixture (for flat engraving).
Calibrate the laser focus (typically using a red laser to focus on the smallest spot).
Connect an exhaust system to prevent engraving dust from contaminating the lens.
2. Design File Processing
Use drawing software (such as CorelDRAW or AutoCAD) to design the pattern/text and save it as a vector file (AI/DXF/PLT format).
Surface Adjustment: If engraving a curved surface on a cup, you’ll need to enable 3D dynamic focus or cylindrical correction in your marking software (such as EZCAD) to avoid distortion.
3. Parameter Settings (reference values, subject to adjustment based on actual material)
Parameters Glazed Ceramics Unglazed Ceramics Notes
Laser Power 30%-70% (20W-50W) 20%-50% (10W-30W) Glazed surfaces require higher power ablation
Frequency 30kHz-80kHz 20kHz-50kHz High frequencies are suitable for fine lines
Speed 500mm/s-1500mm/s 300mm/s-1000mm/s Slower speeds result in deeper marks
Infill Pitch 0.02mm-0.1mm 0.05mm-0.15mm Smaller pitches result in finer details
Number of Scans 1-3 1-2 Multiple scans deepen the color
4. Engraving Procedure
Securing the Ceramic Cup:
Flat Engraving: Place the cup upside down on a flat surface and ensure it is level.
Cylindrical Engraving: Clamp the cup rim with a rotary axis and adjust the concentricity to prevent misalignment of the pattern.
Focus:
Use a laser rangefinder or manual adjustment to focus on the cup surface (typical focal length is 100-200mm).
Trial Engraving:
Test a small area on the bottom of the cup or in a hidden area to optimize parameters such as power and speed.
Production Engraving:
Start the marking machine and observe the results of the first piece. Pause and make adjustments if necessary.
Cleaning:
Use a soft cloth or air gun to remove any remaining dust (especially on glaze surfaces, which may be debris after engraving).

5. Common Problems and Solutions
Problem Cause Solution
Marking color is light. Insufficient power/excessive speed. Increase power or reduce speed. Glaze cracking. Excessive power/localized overheating. Reduce power and increase scan times. Pattern distortion. Curved surface misalignment/focus error. Enable 3D correction and refocus. Unsharp edges. Infill spacing is too large. Reduce spacing (e.g., 0.02mm).
6. Advanced Techniques
Color Marking:
Some glazed ceramics can produce an oxidation discoloration effect by controlling laser energy (low power + high frequency) (repeated testing is required).
Gradient Effect:
Set power gradient parameters in the software to achieve a transition between light and dark.
Anti-Counterfeiting Applications:
Engraving microtext or hidden QR codes (requires a high-precision lens).
7. Safety Precautions
Wear safety goggles to avoid laser reflection injury.
Ventilation: Glaze ablation may release trace amounts of hazardous gases. Ensure ventilation in the work area.
Fire Prevention: Avoid overheating the ceramic by engraving in the same position for extended periods of time.
By following these steps, you can efficiently complete the personalized engraving of your ceramic mug. Due to the significant differences in ceramic composition between different brands, it is recommended to perform multiple parameter tests upon first use and record the optimal configuration for subsequent mass production.